BookSnap Hardware Manual
From Atiz Support Wiki
| Revision as of 05:04, 12 February 2009 Noppadol (Talk | contribs) ← Previous diff |
Revision as of 07:16, 12 February 2009 Noppadol (Talk | contribs) Next diff → |
||
| Line 149: | Line 149: | ||
| [[Image:how_to_install_13.jpg]] | [[Image:how_to_install_13.jpg]] | ||
| + | |||
| + | |||
| + | == '''How to Activate the Software''' == | ||
| + | |||
| + | '''After the software installation is complete, next step is to activate the software.''' | ||
| + | |||
| + | [[Image:how_to_activate.jpg]] | ||
| + | |||
| + | 1. After opening the program, you will see the following dialog that asks for registration. | ||
| + | |||
| + | [[Image:how_to_activate_1.jpg]] | ||
| + | |||
| + | 2. Please fill in your '''Registration Code'''. (Your Registration Code is | ||
| + | located on the back of your CD case) | ||
| + | |||
| + | 3. Once you have filled in the Registration Code, click Get '''Activation Code From The Internet'''. | ||
| + | |||
| + | [[Image:how_to_activate_3.jpg]] | ||
| + | |||
| + | 4. You will be redirected to Atiz online registration page. | ||
| + | |||
| + | Please fill in your information. | ||
| + | |||
| + | Atiz will use this information to contact you in the future about the | ||
| + | software upgrades when they are available. Once you have filled in the | ||
| + | information completely, click '''Submit''' | ||
| + | |||
| + | [[Image:how_to_activate_4.jpg]] | ||
| + | |||
| + | 5. The information will be sent to Atiz server. If your information and the | ||
| + | Registration Code are correct, you will receive the Activation Code. | ||
| + | |||
| + | [[Image:how_to_activate_5.jpg]] | ||
| + | |||
| + | 6. The Activation Code is used to activate your copy of the software.Copy your Activation Code and paste it on the Registration window. | ||
| + | |||
| + | '''(MAKE SURE THERE IS NO BLANK SPACE IN THE BOX).''' | ||
| + | |||
| + | [[Image:how_to_activate_6.jpg]] | ||
| + | |||
| + | 7. Click '''Activate''' and the program will finish the installation successfully. | ||
| + | |||
| + | [[Image:how_to_activate_7.jpg]] | ||
| + | |||
| + | '''Note : Once your are done with the activation of Booksnap software,repeat this process with the activation of BookDrive Editor software.''' | ||
| + | |||
| + | |||
| + | == '''How to Scan a Book''' == | ||
| + | |||
| + | [[Image:how_to_scan_a_book.jpg]] | ||
| + | |||
| + | |||
| + | [[Image:how_to_scan_a_book_7_12.jpg]] | ||
Revision as of 07:16, 12 February 2009
Contents |
About the Manual
Under copyright laws this manual may not be copied in whole or in part without written permission of Atiz.
Atiz and BookSnap are trademarks of Atiz Innovation Co., Ltd., registered in the U.S. and other countries.
Use of the Atiz logo or BookSnap logo for commercial purpose without the prior written permission of Atiz may constitute trademark infringement and unfair competition in violation of federal and state laws.
Every effort has been made to ensure that the information in this manual is accurate. Atiz is not responsible for printing or clerical errors.
Atiz Innovation Co., Ltd.
General Information
Introduction
Thank you for choosing BookSnap, a digital, camera-based, book scanning solution.With BookSnap you are able to create high-quality digital books. This manual will assist you in familiarizing yourself with the device. It contains all the necessary information for set up functions and capabilities.
Copyright Notice
The use of this scanner is subjected to the applicable copyrights for the documents you are scanning. Please observe all copyright laws very carefully. Any use of this scanner that infringes on copyrights of others is strictly prohibited.
Unique Characteristics of BookSnap
BookSnap is a revolutionary new device that will help users digitize bound content quickly without destroying the book. Its sleek design and unique, gentle, V-shaped book cradle will make capturing images from books, magazines and journals seem as easy as taking a picture with a digital camera. This compact device allows for book digitization at a blazing speed of 500 pages per hour.
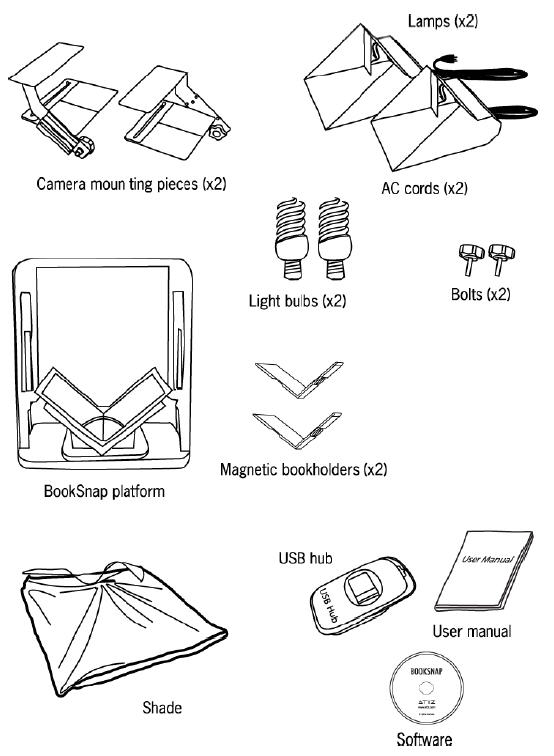
Box Contents
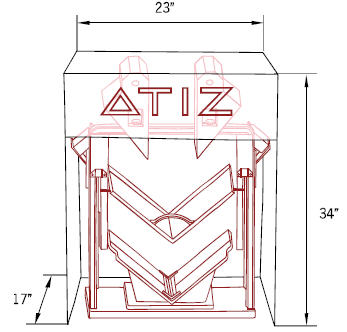
Dimension & Weight
Dimension:
- Depth: 17 inches
- Width: 23 inches
- Height: 34 inches
Weight:
- 20 kg. (44 lbs.)
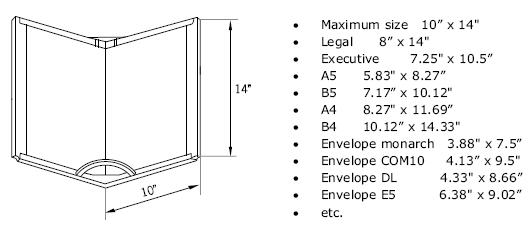
Page Size Support
BookSnap supports pages that are within 10 x14 inches. Some supported standard sizes include:
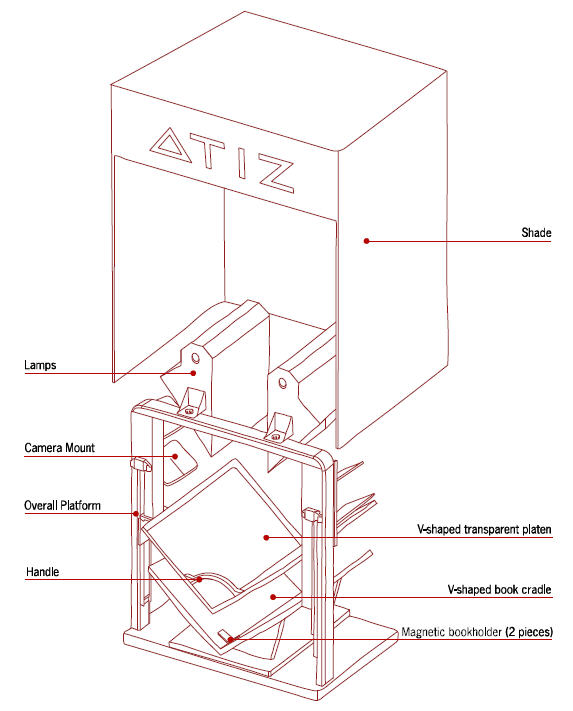
Part Identification
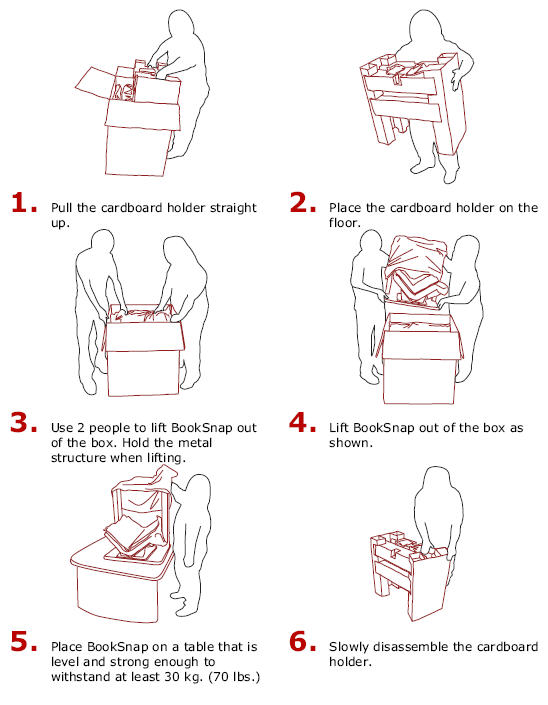
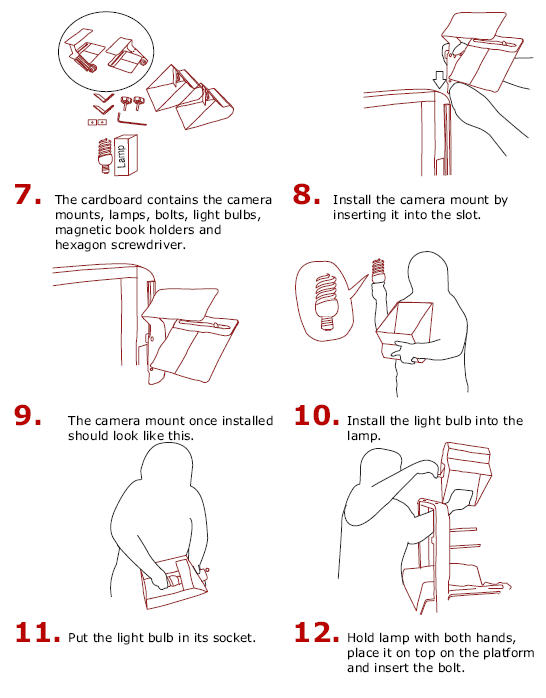
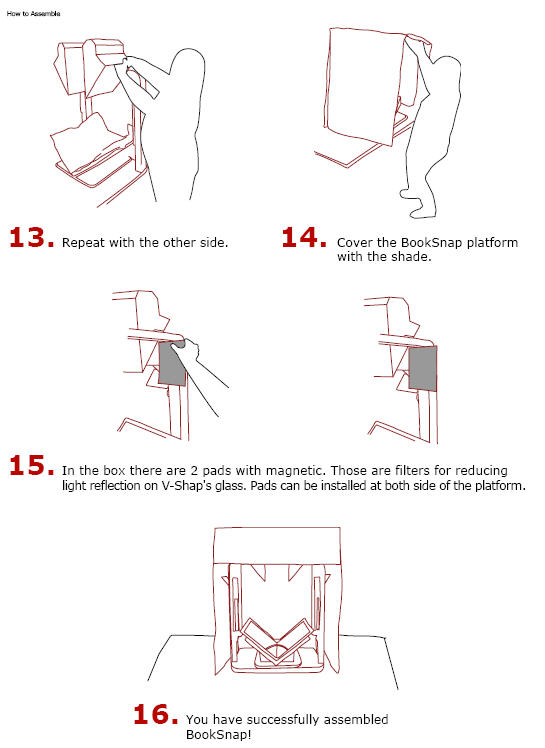
How to Assemble
System Requirements
Note: BookSnap comes with 2 software packages:
- 1. BookSnap software (for controlling the cameras)
- 2. BookDrive Editor (for post image processing)
Due to the SDK provided by Canon, BookSnap software currently does not support Windows Vista. It does work only on Windows XP (Service Pack 2).
As for BookDrive Editor, it works on both Windows XP and Windows Vista.
How to Install the Software
Installation Procedure
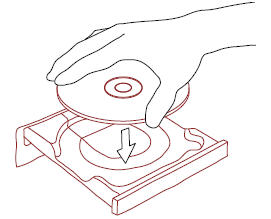
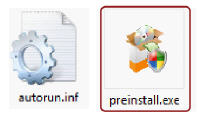
1. Close any programs that are running and insert the Atiz software CD into the computer’s drive.
If the installation panel does not appear automatically, please use the following procedure.
- Open My Computer
- Right-click the CD-ROM icon and select Open.
- Double-click preinstall.exe
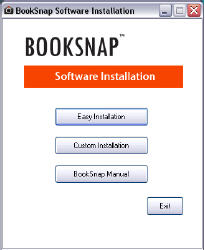
2. After a few seconds, you should see the following dialog come up.
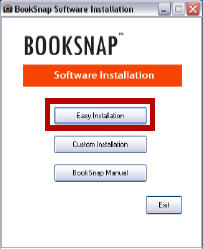
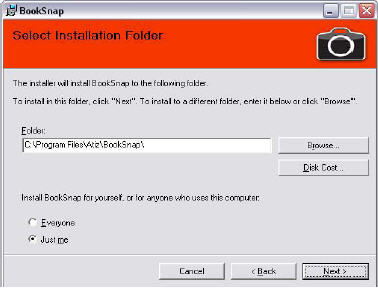
3. Select Easy Installation. Two software programs will be installed.They are BookSnap software (for capturing images) and BookDrive Editor software (for processing the images).
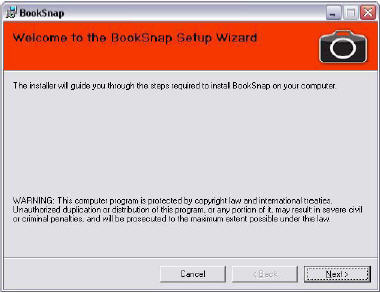
4. Proceed to next steps by selecting Next.
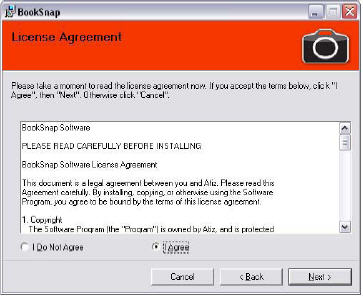
5. Please review the License Agreement. If you agree, select “I Agree” and click Next.
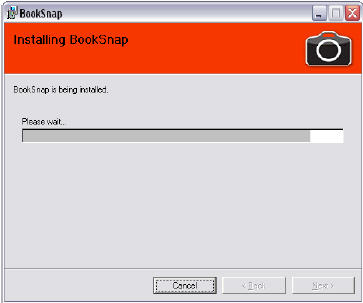
6. BookSnap software will be installed.
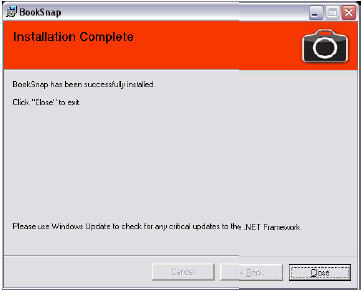
7. After installation of BookSnap software is complete,select Close(to proceed to install another software).
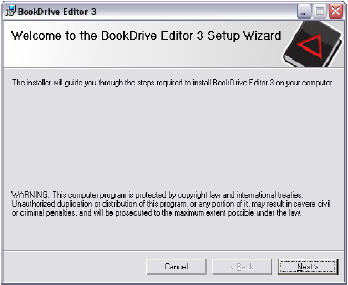
8. The Welcome screen to BookDrive Editor will appear.
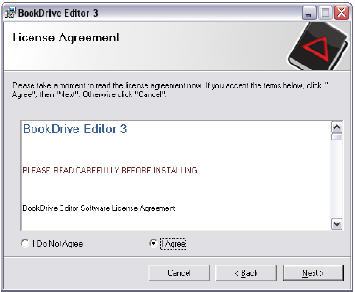
9. Review the License Agreement.If you agree,select “I Agree” and hit Next.
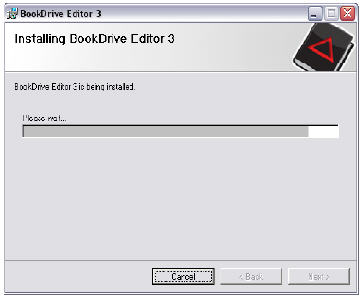
10. Proceed until the installation is complete.
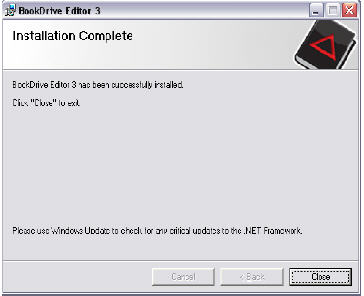
11. It will appear like this when the installation of BookDrive Editor is complete.
Click Close and the OK.
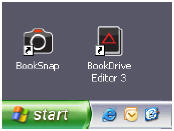
12. BookSnap and BookDrive Editor shortcuts will now appear on your desktop.
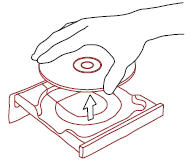
13. Remove the disk from the computer’s drive.
How to Activate the Software
After the software installation is complete, next step is to activate the software.
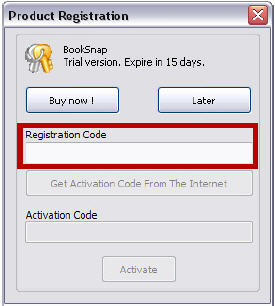
1. After opening the program, you will see the following dialog that asks for registration.
2. Please fill in your Registration Code. (Your Registration Code is located on the back of your CD case)
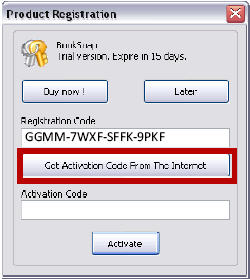
3. Once you have filled in the Registration Code, click Get Activation Code From The Internet.
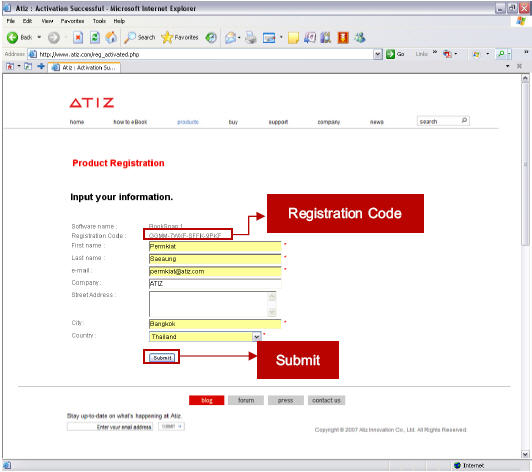
4. You will be redirected to Atiz online registration page.
Please fill in your information.
Atiz will use this information to contact you in the future about the software upgrades when they are available. Once you have filled in the information completely, click Submit
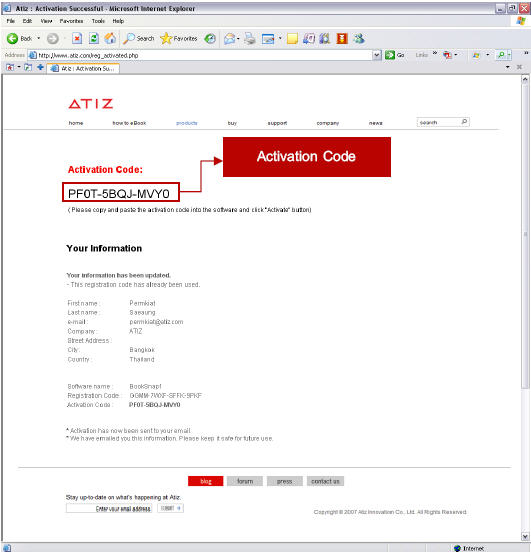
5. The information will be sent to Atiz server. If your information and the Registration Code are correct, you will receive the Activation Code.
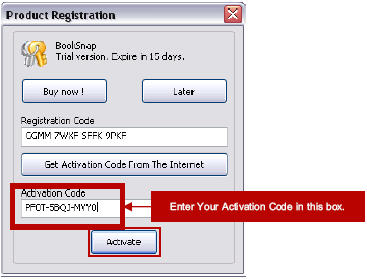
6. The Activation Code is used to activate your copy of the software.Copy your Activation Code and paste it on the Registration window.
(MAKE SURE THERE IS NO BLANK SPACE IN THE BOX).
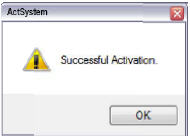
7. Click Activate and the program will finish the installation successfully.
Note : Once your are done with the activation of Booksnap software,repeat this process with the activation of BookDrive Editor software.
