BookDrive Pro Edit Manual
From Atiz Support Wiki
How to edit the images
You can use BookDrive Editor Pro to further enhance the scanned images to your satisfaction.
Step 1 After you‟ve finished scanning the book. Close BookDrive Capture and launch BookDrive Editor Pro
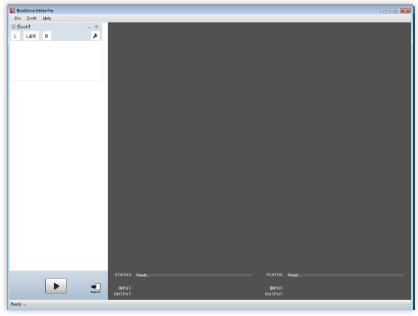
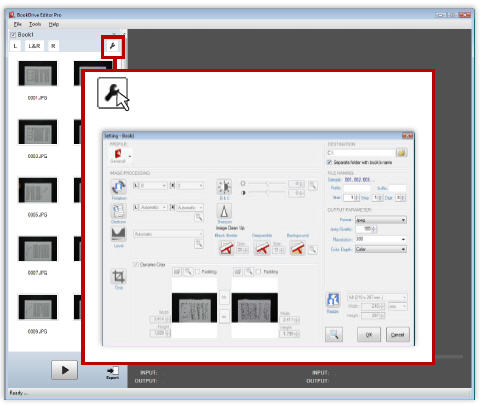
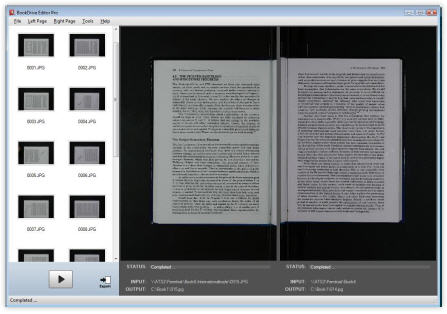
This is the interface of BookDrive Editor Pro. The left column shows thumbnails of the files to be edited. The right column shows preview of output images as they are being processed.
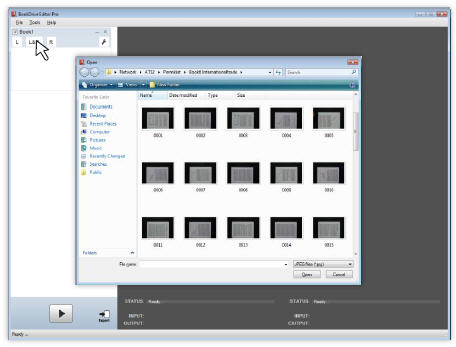
Step 2 To start, you need to select the files to edit.
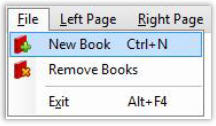
Click “New Book” and “L&R”
The “L&R” button means that you want to add both the left- and right-hand pages.
(Click “L” or “R” if you want to add only the left-hand pages or the right-hand pages).
- To select many files, draw over the area of the files or hold Ctrl while selecting an image.
- To select all, press Ctrl + A.
Click Open. The program will add the selected images to the waiting list of files to be processed.
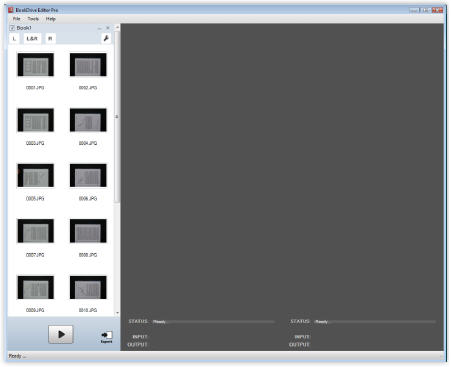
Step 3 The left column will display the file thumbnails.
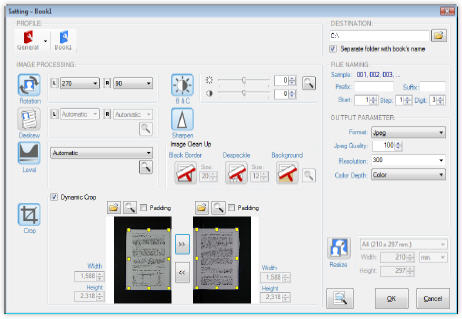
You will see the Setting window as shown here:
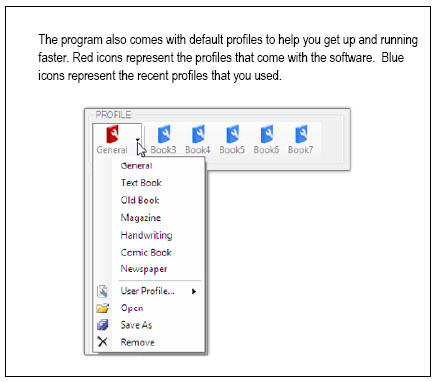
You don‟t have to make settings every time. You can save you these settings as a
„profile‟ for later use.
Step 5 Click on an image operation that you want to enable.
For example, this is what will appear if you enable the image rotation.
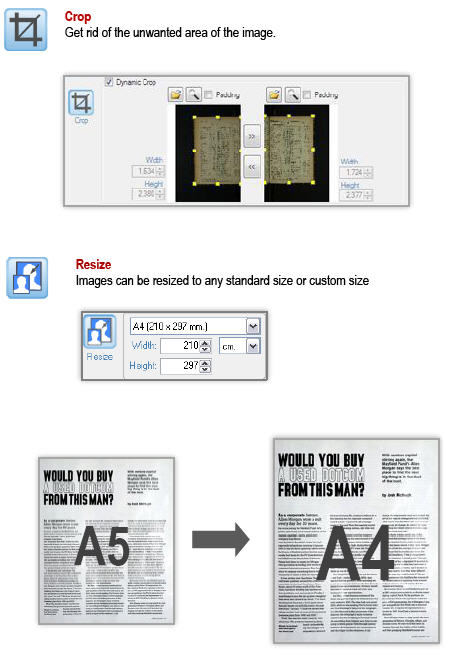
Here are some of the available image operations:
Image rotation
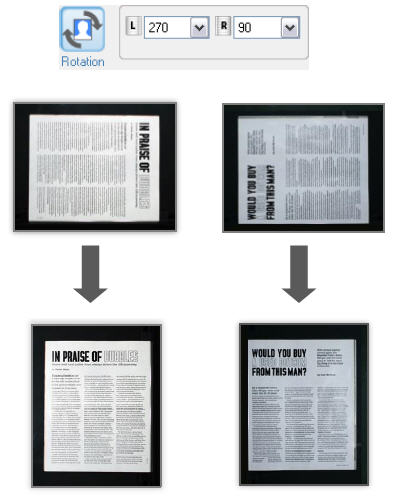
You have options to rotate the image 0, 90, 180 or 270 degrees clockwise.
Normally, rotate the left-hand image by 270 degrees and the right-hand image by 90 degrees.
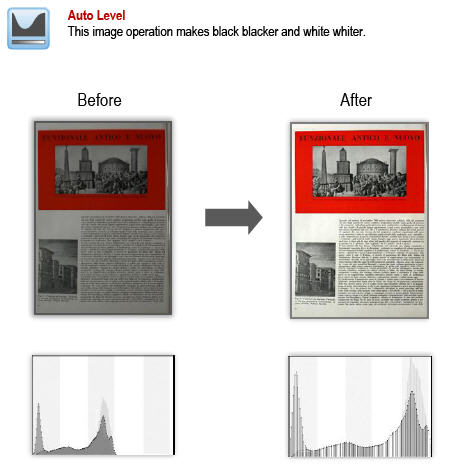
What does Auto Level do?
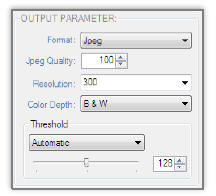
Output file selection
- The available output format options are TIFF or JPEG.
- Available compressions for TIFF are LZW, CCITT G3, CCITT G4
- Users can also select the level of compression for JPEG format by setting its quality level.
- Resolution is where you can set DPI of the output image. You can select 100, 200, 300, 600 DPI or specify the exact desired DPI.
- Available color options are: Black and White, Grayscale and Color.
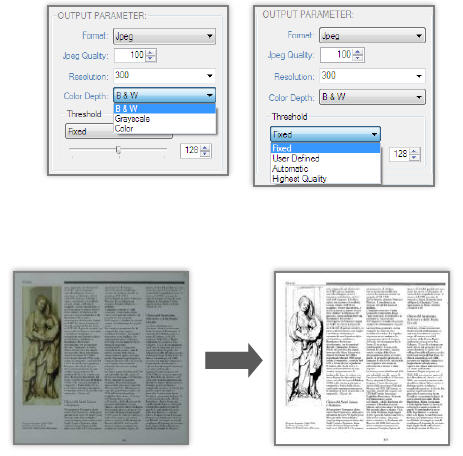
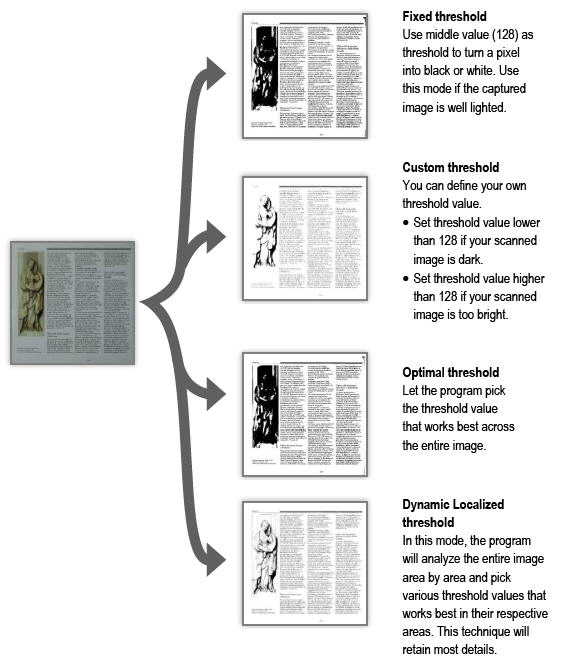
- As for Black and White conversion, there are many types of conversions allowed. This has to do with the threshold of how a given a pixel is converted to either a black or white pixel.
* Fixed (threshold value is set at 128)
* User defined (users can define other threshold values)
* Automatic (the level of optimal threshold will automatically be selected by the computer).
* Highest Quality (this setting can be known as dynamic localized thresholding, which means there can be many thresholding values on a page. If selected, the program will scan the entire page and automatically adjust the thresholding values for optimal values throughout the pages. This setting will take the longest time but will provide the best quality.)
Black & white conversion
Examples of results using different thresholding techniques:
Before running the actual operations, you can see the preview of the outcome you will get by clicking Preview button ![]()
If you‟re not satisfied with the result in the preview, go back to make change to the settings until you get satisfactory result.
You can add another chapter or even a completely different book to the queue.
Press New book again and repeat the steps for the settings.
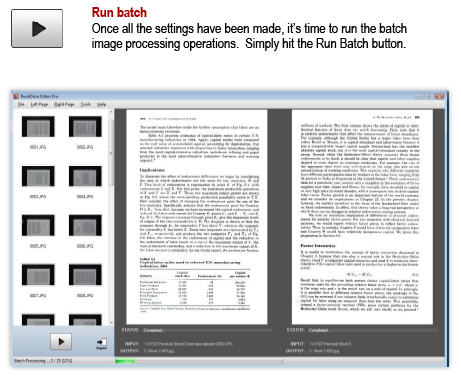
If you want to stop, click the same button again.
Finished Steps You will get the satisfied pictures.
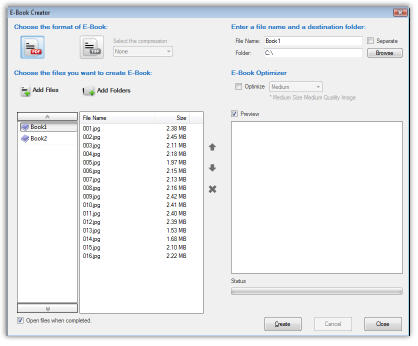
Once clicked, you will see this window.
Steps
1. Click Export button.
2. Select the images you want to export.
3. Select the output format (PDF or TIFF)
4. Click Create.

